はじめに
この記事を読めば、JavaScriptを使ってピンチインを実装することができるようになります。
ピンチイン操作を使いこなすことで、ユーザーにとって使いやすく魅力的なウェブサイトやアプリを作成することができます。
●ピンチインの実装方法
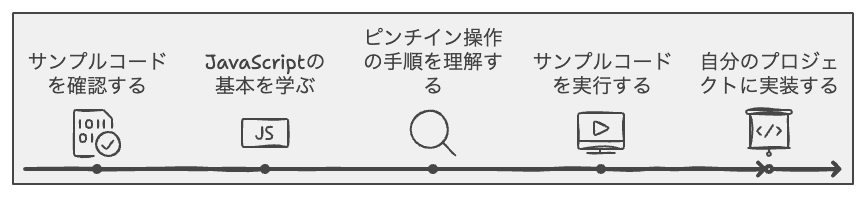
ここでは、JavaScriptを使ってピンチイン操作を簡単に実装する方法を5つ紹介します。
サンプルコード付きで説明するので、初心者の方でも安心して取り組むことができます。
○サンプルコード1:基本的なピンチインイベントの検出
まずはじめに、ピンチイン操作を検出する基本的なコードを紹介します。
この例では、”touchstart”、”touchmove”、”touchend” イベントを用いて、ピンチイン操作を検出しています。
let startDistance = 0;
function onTouchStart(event) {
if (event.touches.length === 2) {
startDistance = Math.hypot(
event.touches[0].pageX - event.touches[1].pageX,
event.touches[0].pageY - event.touches[1].pageY
);
}
}
function onTouchMove(event) {
if (event.touches.length === 2) {
const distance = Math.hypot(
event.touches[0].pageX - event.touches[1].pageX,
event.touches[0].pageY - event.touches[1].pageY
);
if (distance < startDistance) {
console.log('ピンチイン操作が検出されました。');
}
}
}
document.addEventListener('touchstart', onTouchStart);
document.addEventListener('touchmove', onTouchMove);
○サンプルコード2:ピンチインによる画像の拡大・縮小
次に、ピンチイン操作を使って画像を拡大・縮小するコードを紹介します。
この例では、ピンチイン操作を検出し、画像のスケールを変更しています。
const img = document.querySelector('img');
let startDistance = 0;
let startScale = 1;
function onTouchStart(event) {
if (event.touches.length === 2) {
startDistance = Math.hypot(
event.touches[0].pageX - event.touches[1].pageX,
event.touches[0].pageY - event.touches[1].pageY
);
startScale = parseFloat(img.style.transform.slice(7)) || 1;
}
}
function onTouchMove(event) {
if (event.touches.length === 2) {
const distance = Math.hypot(
event.touches[0].pageX - event.touches[1].pageX,
event.touches[0].pageY - event.touches[1].pageY
);
const scale = startScale * (distance / startDistance);
img.style.transform = `scale(${scale})`;
}
}
document.addEventListener('touchstart', onTouchStart);
document.addEventListener('touchmove', onTouchMove);
○サンプルコード3:ピンチインによる地図の拡大・縮小
このコードでは、ピンチイン操作を使って地図を拡大・縮小する方法を紹介しています。
この例では、Google Maps APIを使用して地図を表示し、ピンチイン操作で地図のズームレベルを変更しています。
<!DOCTYPE html>
<html>
<head>
<title>ピンチインによる地図の拡大・縮小</title>
<script src="https://maps.googleapis.com/maps/api/js?key=API_KEY"></script>
<script>
let map;
function initMap() {
map = new google.maps.Map(document.getElementById('map'), {
center: {lat: 35.6895, lng: 139.6917},
zoom: 8
});
document.getElementById('map').addEventListener('touchmove', onTouchMove);
}
function onTouchMove(event) {
if (event.touches.length === 2) {
const currentZoom = map.getZoom();
const distance = Math.hypot(
event.touches[0].pageX - event.touches[1].pageX,
event.touches[0].pageY - event.touches[1].pageY
);
if (distance < startDistance) {
map.setZoom(currentZoom - 1);
} else {
map.setZoom(currentZoom + 1);
}
}
}
</script>
</head>
<body onload="initMap()">
<div id="map" style="width: 100%; height: 100vh;"></div>
</body>
</html>
○サンプルコード4:ピンチインを使ったスライダーの操作
この例では、ピンチイン操作を使ってスライダーを操作する方法を紹介しています。
ピンチイン操作でスライダーの値が変更されるようになっています。
<!DOCTYPE html>
<html>
<head>
<style>
.slider {
width: 300px;
}
</style>
</head>
<body>
<input type="range" class="slider" min="0" max="100" value="50" id="mySlider">
<script>
const slider = document.getElementById('mySlider');
let startDistance = 0;
function onTouchStart(event) {
if (event.touches.length === 2) {
startDistance = Math.hypot(
event.touches[0].pageX - event.touches[1].pageX,
event.touches[0].pageY - event.touches[1].pageY
);
}
}
function onTouchMove(event) {
if (event.touches.length === 2) {
const currentDistance = Math.hypot(
event.touches[0].pageX - event.touches[1].pageX,
event.touches[0].pageY - event.touches[1].pageY
);
const change = (currentDistance - startDistance) * 0.5;
slider.value = parseFloat(slider.value) + change;
startDistance = currentDistance;
}
}
slider.addEventListener('touchstart', onTouchStart);
slider.addEventListener('touchmove', onTouchMove);
</script>
</body>
</html>
○サンプルコード5:ピンチインを使ったカルーセルの操作
最後に、ピンチイン操作を使ってカルーセルを操作する方法を紹介します。
この例では、ピンチイン操作でカルーセルのアイテムが切り替わるようになっています。
<!DOCTYPE html>
<html>
<head>
<style>
.carousel {
display: flex;
overflow: hidden;
width: 300px;
height: 200px;
}
.carousel-item {
width: 100%;
height: 100%;
display: none;
}
.carousel-item.active {
display: block;
}
</style>
</head>
<body>
<div class="carousel">
<img src="image1.jpg" class="carousel-item active">
<img src="image2.jpg" class="carousel-item">
<img src="image3.jpg" class="carousel-item">
</div>
<script>
const carousel = document.querySelector('.carousel');
const items = document.querySelectorAll('.carousel-item');
let startDistance = 0;
function onTouchStart(event) {
if (event.touches.length === 2) {
startDistance = Math.hypot(
event.touches[0].pageX - event.touches[1].pageX,
event.touches[0].pageY - event.touches[1].pageY
);
}
}
function onTouchMove(event) {
if (event.touches.length === 2) {
const currentDistance = Math.hypot(
event.touches[0].pageX - event.touches[1].pageX,
event.touches[0].pageY - event.touches[1].pageY
);
const change = (currentDistance - startDistance) * 0.1;
if (Math.abs(change) > 30) {
changeItem(change);
startDistance = currentDistance;
}
}
}
function changeItem(direction) {
const currentIndex = Array.from(items).findIndex(item => item.classList.contains('active'));
const newIndex = direction > 0 ? currentIndex + 1 : currentIndex - 1;
if (newIndex >= 0 && newIndex < items.length) {
items[currentIndex].classList.remove('active');
items[newIndex].classList.add('active');
}
}
carousel.addEventListener('touchstart', onTouchStart);
carousel.addEventListener('touchmove', onTouchMove);
</script>
</body>
</html>
以上のサンプルコードで、ピンチイン操作によってカルーセルのアイテムが切り替わるように実装されています。
ピンチイン操作で指の距離が一定以上変わったときに、アイテムが切り替わるようになっています。
●注意点と対処法
ピンチイン操作を実装する際には、次のような注意点があります。
- タッチイベントの取得:タッチイベントを適切に取得し、複数の指が画面に触れている状態を正確に処理することが重要です。
- デバイスの画面サイズや解像度:デバイスの画面サイズや解像度によって操作感が異なるため、さまざまなデバイスで適切に動作するように調整が必要です。
- イベントの伝播:タッチイベントが他の要素に影響を与えないように、適切にイベントの伝播を制御することが必要です。
対処法
- タッチイベントを取得する際に、event.touches.length などのプロパティを使って、正確に複数の指が画面に触れている状態を判断しましょう。
- デバイスの画面サイズや解像度に応じて、ピンチイン操作の感度や閾値を調整することで、異なるデバイスでも快適に操作できるようにしましょう。
- イベントの伝播を制御するために、event.stopPropagation() や event.preventDefault() などのメソッドを適切に使用しましょう。
●カスタマイズ方法
ピンチイン操作を実装する際に、次のようなカスタマイズ方法が考えられます。
- 操作感の調整:ピンチイン操作の感度や閾値を調整し、ユーザーにとって使いやすい操作感にカスタマイズできます。
- イベントの追加:ピンチイン操作以外にも、タップやスワイプなどの操作を追加し、さらに豊かなインタラクションを実現できます。
- デザインの変更:カルーセルやスライダーのデザインを変更することで、アプリケーションの見た目をカスタマイズできます。
まとめ
本稿では、ピンチイン操作を実装する方法や注意点、カスタマイズ方法について解説しました。
適切なイベント処理やデバイス対応、カスタマイズを行うことで、ユーザーにとって使いやすいインタラクションを提供できるようになります。
ピンチイン操作は、スマートフォンやタブレットなどのタッチデバイスで広く利用される操作であり、アプリケーションの操作性やユーザビリティを向上させることができます。
今回紹介した実装方法やカスタマイズ方法を参考に、さまざまなタッチ操作をサポートするアプリケーションやウェブサイトを開発してみてください。
また、最新の技術やフレームワークを活用することで、より効率的にタッチ操作を実装することができます。
例えば、ReactやVue.jsなどのフロントエンドフレームワークを使用することで、コンポーネントの再利用や状態管理を容易に行うことができます。
最後に、ユーザビリティを向上させるためには、テストやフィードバックが重要です。
実際のユーザーに試してもらい、操作感やデザインに問題がないか確認しましょう。
そして、フィードバックを元に改善を繰り返すことで、より使いやすいアプリケーションやウェブサイトを開発できるでしょう。